Installation & Operational Manual
1. Installation Steps
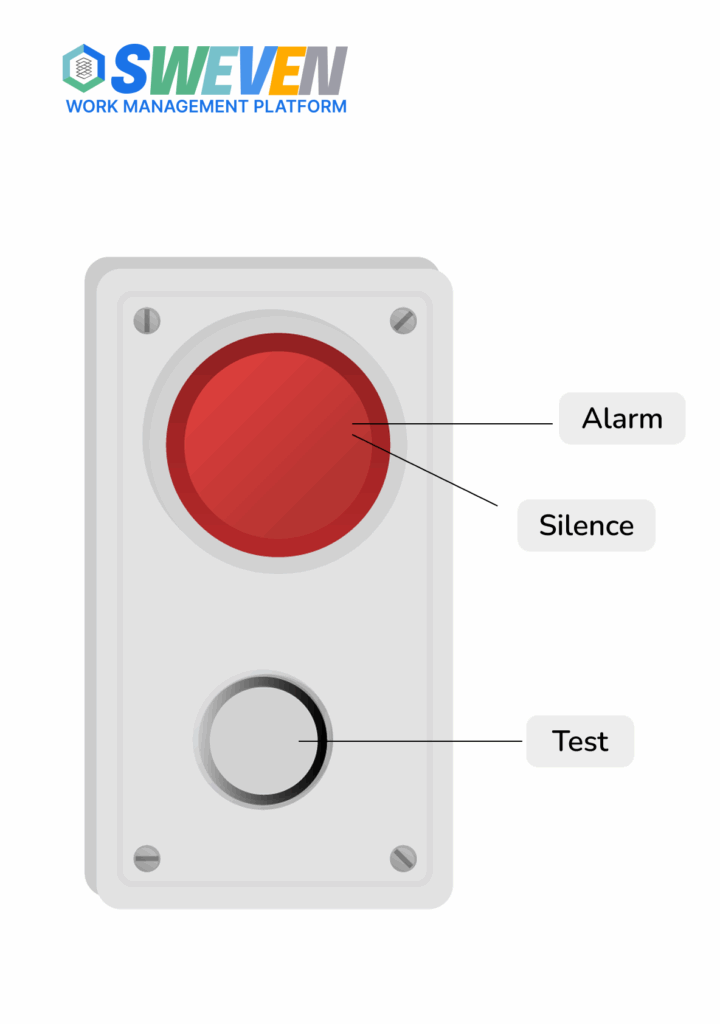
The red LED and alarm buzzer will remain off until the preset level is reached.
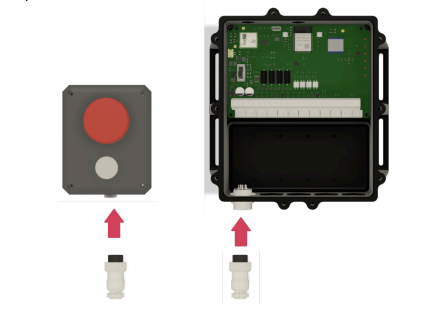
Mount the Fixture
Install the light/alarm box in a visible location near the oil tank (e.g., on a wall or control panel).
Ensure power is available (hardwired or plugged into a designated outlet).
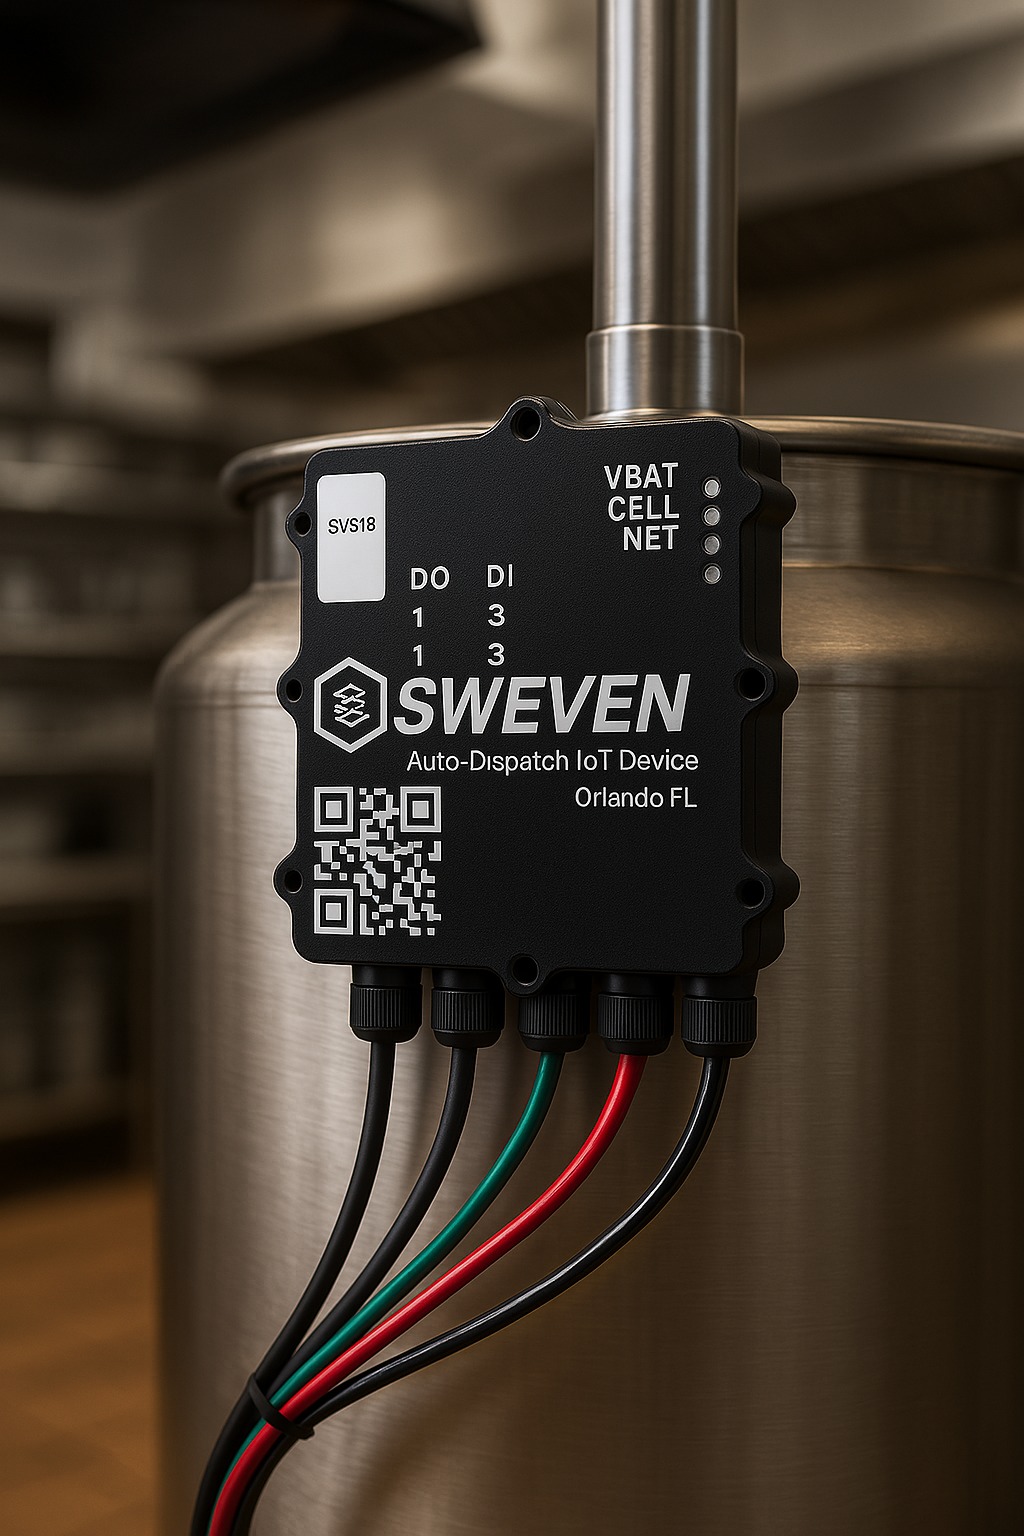
Connect the Sensor
Attach the tank-level sensor to the oil tank per manufacturer guidelines.
Verify the sensor is calibrated to trigger at the 70% oil level preset.
Power On
Once powered, the system will self-test (no action required).
2. Control Sequence & Operations
| Step | Action | System Response |
| 1 | Tank level reaches 70% | Red LED turns ON + Alarm buzzer sounds (80 dB). |
| 2 | Press red button (Silence) | Buzzer silences permanently (LED remains ON). |
| 3 | Tank level drops below 70% | Red LED turns OFF. |
| 4 | Tank level rises above 70% again | LED reactivates; buzzer does not re-trigger unless manually reset. |
Notes:
- The system logs the date/time of each 70%+ alarm event.
- Staff must respond to prevent overfill (venting liability rests with the location).
3. Escalation & Notifications
- Automated Alerts (via email):
- 70%: Initial warning to designated staff (up to 5 contacts).
- 80%: Escalated to managers/supervisors.
- 90%: Critical – Service dispatched immediately; oil flow must stop.
- Costs:
- Unscheduled pickups at 90% are the location’s financial responsibility.
4. Maintenance & Troubleshooting
- Testing: Press the white button to manually trigger the alarm (confirms functionality).
- Alarm Acknowledgment: Once silenced, the buzzer will not sound again until the next new 70%+ event.
- Sensor Calibration: Contact support if the LED/buzzer triggers inaccurately.
For more information see Alarm Response Procedure