Sweven is an out-of-the-box solution for Facilities Management that allows you to have a complete view of your work, communicate with your Vendors and Clients, map your Sites, assign Work Orders, send Billing, and much more.
Let’s start by entering your data as we show you how it correlates with your daily operation.
1. Clients
Setting up a Client paves the way for a successful workflow, as this indicates to you and your Users where the Work Orders are coming from, who gets notified of your progress, how many Work Orders are being worked on for this Client, and the Status of all of them.
Add a New Client
Clients provide us with their Tasks and a Site to work at. To add a New Client, go to List Manager/Clients/Add on the Main Menu or follow this link for a detailed step-by-step.
Add your Client Contacts and Sites
Once a Client is added, you can enter all relevant information. If you have a Client with a large number of Contacts and Sites, you can use the Import Tools option.
Set up your Client Contacts to have them notified of status changes, monitor who is assigned to a Work Order on your end, and grant them access to the Client Portal when needed.

You can see the Status of Clients in a Pipeline View in List Manager/Business/Clients.
2. Projects
Projects are a useful way to keep track of work within a time frame or to differentiate different streams of work coming from the same Client. You can also add and categorize by Sub-projects, to handle specific stages of your work or a different set of tasks specific to Vendors.
You can also Budget your Project and correlate it to a Contract (Settings/Finance/Contracts) where you can attach paperwork and Terms for reference and compliance.
Adding a New Project
Go to the hamburger menu on the left side of the screen, then List Manager/Project. Contracts can also be added after setting them up in the previous stage.
Adding a Sub Project
Go to the «Sub Projects» tab and click on «+Add». You can assign this Sub Project to one of your Project Managers and set or change the Status of all Work Orders in this Sub Project.

3. Work Orders
Now we have everything we need to Create and populate the details of the task provided as a New Work Order.
A Work Order is the basic unit in Sweven, it works as an identifier to your task and it contains all information related to it: a description of the work to perform, an ETA, the Client requesting service, the Trade it covers, and more. It can then be dispatched to Vendors with Instructions and attachments or serve as an actionable information repository for self-performers.
For a detailed explanation of Work Order Creation and elements, please visit this link.

4. Vendors
With your Work Order now filled out, it’s time to work on it. Depending on your line of business, this can now be Dispatched to a Vendor or be assigned to your in-house personnel for self-perform.

Vendor Onboarding
If your focus is on external Vendors, you can add them to Sweven in order to Dispatch Work Orders to them and access the Vendor Portal for managing the work, you can learn the process here.
Vendors can provide the needed documentation (insurance certificates, vendor agreements, W9 forms) and information on their Trade to be onboarded directly to Sweven once you review and authorize their entries. Find the step-by-step guide here.
If you already have a large list of your Vendors and need to upload them all at once, you can do so with Sweven’s Import Tools.
Dispatch to External Vendors
Service providers in your network can be assigned a Work Order and be notified instantly on assignment via email. They will get a summary of the job information and will be able to provide documentation and pictures from the field to the Work Order themselves into Sweven without any additional data entry. Once work is finished and verified, they can provide an update directly back to you.
Learn the specifics on dispatching Work Orders to External Vendors here.

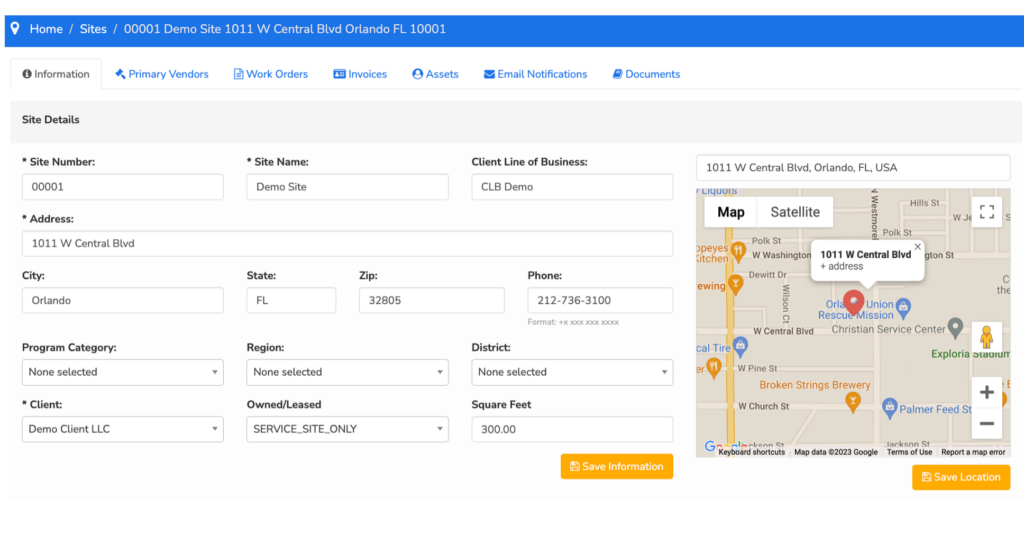
5. Sites
These are the Work sites where the action takes place. A Work Order is related to this location or Site, letting you, vendors, and technicians have precise bearings, displayed on a map in Sweven on your laptop or mobile phone.
You can review the work being performed at any specific Site by clicking on the «Work Orders tab», especially when working with multiple Vendors for different Trades.
Set a Primary Vendor for a Site
A Site can be assigned a Primary Vendor for a specific Trade. If a Vendor is performing great at a Site or needs to perform work in stages, you can select him as a Primary Vendor for this Trade to have a quick way for task assignment.
6. Mobile
Technicians can be provided with Work Order information to perform the required task on a Site, both from your Techs as self-performers and to Vendor technicians if using an external provided.
Once you provide them access, they will be able to accept or reject the task, see the Job Description, Site information and upload relevant notes, picture and documentation directly to a Work Order.
Please find the right app for your operating system below.


And we’re set! Now, you can work with the task you receive from Clients, create a Work Order and assign it to a Vendor to be performed in a few clicks.