Keeping a flowing work queue is a key element in any company’s efforts towards organized labor, operations control, and excellence in service for its clients.
Sweven organizes this process into individual tasks that you can manage as Work Orders. From its creation to its closure or archiving, every Work Order follows a predefined cycle where specific events take place and important information is added and updated.
Every company has its workflow developed over the years of efforts and in helping this, Sweven adapts to and enriches the one you currently have.
Work Order Lifecycle in Sweven
The basic workflow of a work order consists of 5 stages:
- WO Creation.
- Scheduling and Dispatching.
- Execution of the task.
- Invoicing and Billing.
- Closure / Archive.
Your Pipeline works as an interactive picture of your tasks and their status and lifecycle.

Let’s have a closer look at the stages in the lifecycle where a new task, received from a Client gets serviced, billed, and completed.
1. Work Order Creation
Work orders are a representation of a task provided by a Client. This can be a formal purchase order, a task resulting from an inspection or even an emergency item to be serviced first thing.
These work orders can be created by your team as a representation of this task to be managed using Sweven or requested directly by a Client using a dedicated Client Portal.

Creating new work orders is very much like filling out a form in which each field will provide not only information but will also help organize, estimate, and manage your work queue.
Upon creation, a Work Order number will be automatically assigned and it will enter the Pipeline in the «Planning» status by default with all the required information to be managed and enhanced by your team before scheduling and dispatching.
You can learn about the specifics of creating a new work order here.
2. Scheduling and Dispatch
Once a work order has been created and saved, the next step is to set a time frame to be completed and to be scheduled with your staff or an external vendor to be serviced.
In this stage, you’ll be able to modify and update a work order before scheduling, you can:
-Edit and expand on the job description and details,
-Add notes with pictures,
-Attach files and documentation,
-Estimate costs and profit using the calculator,
-Specify the job Deadline and ETA.
Scheduling
Once all information has been filled out and it’s good to go, we proceed to set an ETA or deadline. This will inform the Client, external Vendor, and your staff when this order is due to be delivered.

This date will be highlighted in red in your pipeline if the ETA date has passed, for your team to be notified and informed.

Dispatch
Sweven can dispatch a work order to your in-house staff or external Vendors and notify them of this assignment and its deadline.
Self performers can choose the «Assign Vendor Self» option to then be moved

In order to set a vendor for the Work Order, you can use the Find Vendor feature, which will list available contractors based on the WO Problem Category and proximity to the Site to be serviced. Assign Vendor Self will automatically set your company as the responsible for the WO job.
Once assigned, you’ll need to coordinate the Vendor ETA date with the contractor or the technician assigned. To do that, your WO Deadline and Vendor Deadline dates should serve as a reference to find the best ETA to perform the service. You can either set the Vendor ETA manually (by picking a date and saving the Work Order) or dispatch the WO to the Vendor, which will notify them via email and prompt them to set an ETA.
To Dispatch the WO, you need to have a Vendor assigned and click the Dispatch WO button to save and send. Once dispatched, the WO is ready and scheduled for servicing when the ETA date comes.
Execution of the task(s)
Work ETA arrives and the technician (an employee or a 3rd party contractor) drives to the site to service your client. All the necessary information is compiled in the Work Order, which technicians can easily access through Sweven Mobile App.
By logging in to the Mobile App, the technician user will see a list of all WOs assigned to him and will visualize specific WO information, Site details, the Job Description, and any notes you’ve marked as «Show this note to Tech».
With all this information available, the technician will also be able to add new notes with pictures or videos to detail and expand on the work performed. The technician is also able to change the WO status to reflect pauses and lunch breaks, and to move the WO forward in the workflow when the job is complete (these actions are editable in the Owner Settings – Forms Administration – Sub Status menu).
When the WO is completed, the technician will be prompted to add a signature and a brief reference to any materials and extras incurred, information that will be automatically saved as a note in the WO. The WO is then officially complete and ready for the Billing and Invoicing stage.
Invoicing and Billing
You can keep track and associate your invoices with specific Work Orders through the Billing sections for both your Vendors and Clients. Each one will have it’s own workflow, which you can edit from Owner Settings – Pipeline Settings.
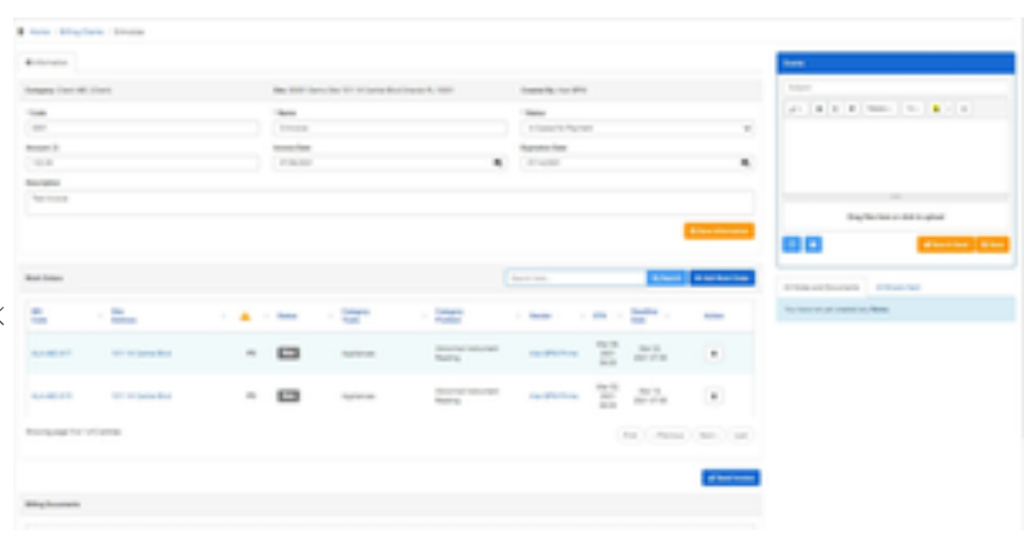
When creating a new Invoice (be it a received invoice you need to cancel or a sent invoice to one of your clients), you can input the invoice number, a name, issue and expiration dates, as well as attaching documents to it. The Work Order list will help you find and associate the work orders that the invoice pertains.
Closure / Archive
Once work is done and all invoices are paid, the cycle is over. In general, work orders are archived or simply kept in Closed status in case there’s the need to consult them in the future.
It is useful for many companies to perform some assessment and Quality Control activities before a WOs closure to improve processes and make sure the WO is archived with all the right information in it.